
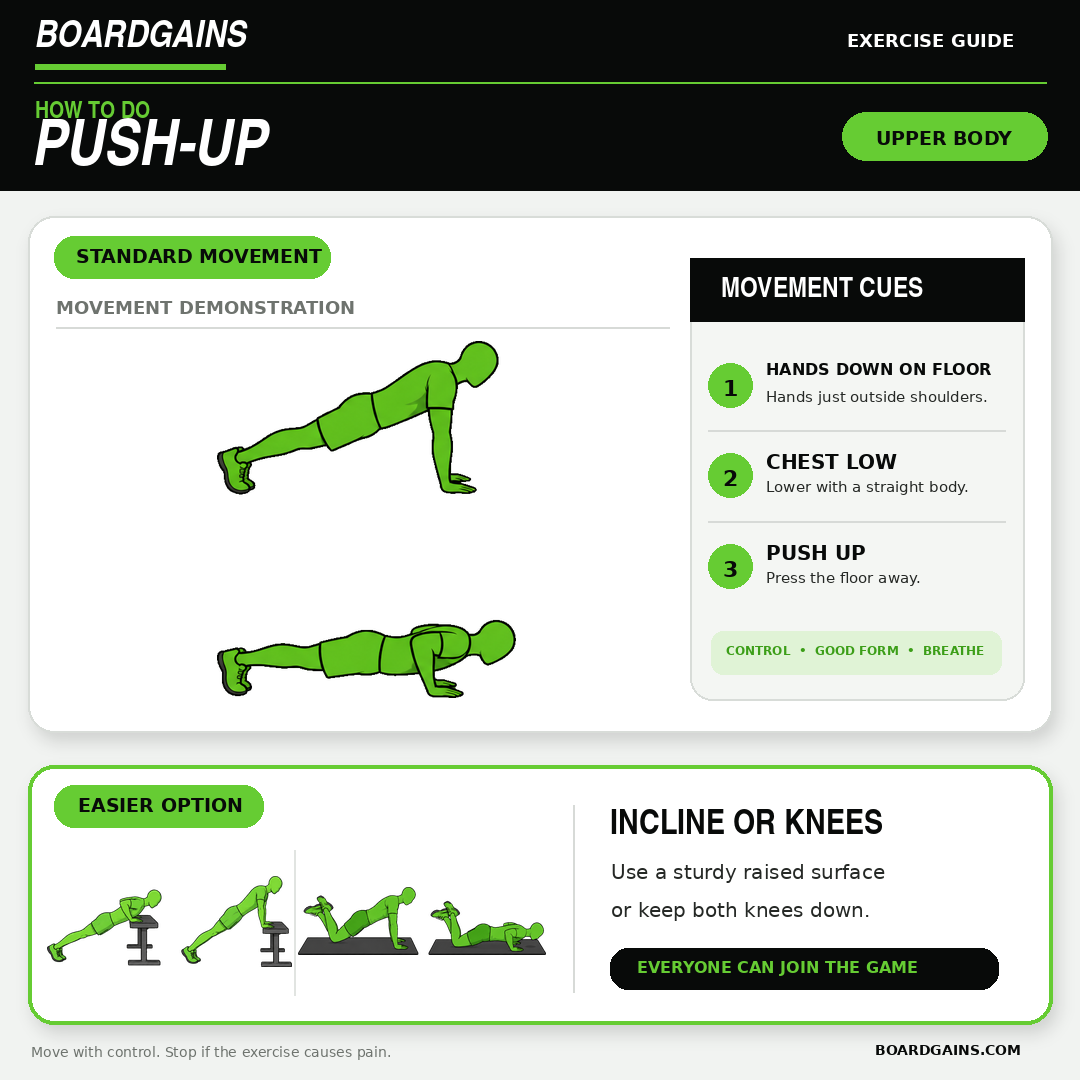
A push-up is a classic bodyweight exercise, but the details matter. Good hand placement, a strong body line and a controlled elbow path help you train your chest, shoulders, arms and core as one connected unit.
Written by Eric Mathura, B.Sc. Kinesiology and CSEP-CPT, with more than 10 years of experience as a personal trainer and group fitness instructor. Updated August 19, 2026.
Quick answer: Start in a high plank with your hands around chest level and slightly wider than your shoulders. Brace your core and squeeze your glutes. Lower your chest between your hands while your elbows travel back at roughly a 30- to 45-degree angle from your torso. Press the floor away and return to a straight, strong plank. One controlled lower and press back to the start equals one rep.
Push-Up Overview
- Main muscles: Chest, triceps and front shoulders
- Supporting muscles: Abdominals, glutes, quadriceps and upper back
- Equipment: None; a wall, bench or sturdy raised surface can be used for modifications
- Difficulty: Beginner to advanced, depending on the version
- Movement pattern: Horizontal press with full-body stabilization
- One rep: Lower under control, then press back to the starting plank
What Is a Push-Up?
A push-up is a bodyweight pressing exercise performed from a high-plank position. You bend your elbows to lower your body toward the floor, then straighten your arms to return to the top. Your hands stay planted while your chest, shoulders and triceps produce most of the pressing force. At the same time, your core and lower body keep your trunk and hips from sagging or twisting.
The standard floor push-up is only one version. Wall push-ups, incline push-ups and knee-supported push-ups use the same basic pattern with less resistance. This makes the exercise easier to scale than it may first appear. The best version is the one that lets you move with control through a comfortable range.
A push-up is not simply an arm exercise. Think of it as a moving plank: your shoulders and elbows move, but your head, rib cage, pelvis and legs should remain organized as one strong unit.
How to Do a Push-Up Step by Step
- Set your hands. Place your palms on the floor around chest level and slightly wider than shoulder-width. Spread your fingers and press through the whole hand.
- Step into a high plank. Extend both legs behind you. Keep your feet together or about hip-width apart, whichever gives you better control.
- Create full-body tension. Brace your stomach, lightly tuck your ribs, squeeze your glutes and tighten your legs. Aim for a long line from the back of your head through your hips to your heels.
- Set your gaze. Look at the floor slightly ahead of your hands. Keep your neck long instead of lifting or dropping your head.
- Lower with control. Inhale and bend your elbows. Lower your chest between your hands while your shoulders and hips travel down together.
- Guide the elbows back. Let your upper arms form an arrow shape with your torso rather than a wide letter T. An elbow angle of roughly 30 to 45 degrees is a useful starting point, but your comfortable angle may vary.
- Use a pain-free depth. Descend as far as you can while keeping your body line, hand pressure and shoulder comfort. Your chest does not have to touch the floor.
- Press up. Exhale, push the floor away and straighten your arms. Keep your hips and shoulders rising at the same rate.
- Finish the rep. Return to the high plank without letting your lower back sag or your shoulders collapse. Reset your breath and repeat.
How to count a rep: One controlled descent followed by a press back to your starting plank equals one repetition. If you are following a BoardGains card, complete the number shown using a version you can control.
Key Push-Up Technique Cues
Place Your Hands Around Chest Level
Hands that are too far forward can make the exercise feel awkward at the shoulders. At the bottom, your palms should generally be beside the lower-to-middle part of your chest rather than beside your face. Start slightly wider than shoulder-width and make small adjustments based on your arm length and comfort.
Keep the heel of your palm, thumb side and little-finger side connected to the floor. Spreading your fingers increases your base of support. If your wrists feel uncomfortable, try an incline version first because it reduces the amount of body weight supported by your hands.
Keep Your Body Moving as One Unit
Your shoulders should not reach the bottom while your hips stay high, and your hips should not sink before your chest moves. Brace as if you are holding a firm plank. Squeezing your glutes and legs can make this easier than thinking about your abdominals alone.
A wider foot position provides more balance and can reduce side-to-side movement. A narrow stance creates a smaller base of support. Either is acceptable if you can keep your pelvis level.
Use an Elbow Path You Can Control
There is no single elbow angle that fits every person. Your shoulder structure, hand width and mobility all matter. For many people, guiding the elbows back at about 30 to 45 degrees from the torso is a comfortable starting point. Avoid forcing your elbows tightly against your ribs or letting them flare straight out to the sides.
Let Your Shoulder Blades Move Naturally
Your shoulder blades should glide around your rib cage as you lower and press. Do not try to pinch them together and hold them still for the entire repetition. At the top, actively press the floor away without rounding your whole upper back or shrugging toward your ears.
Choose Quality Depth
Depth should be earned, not forced. Lower only as far as you can keep your trunk firm and your shoulders comfortable. If your body line changes near the bottom, use a higher incline or a smaller range and build from there. Consistent, controlled repetitions are more useful than reaching the floor with poor position.
What Muscles Do Push-Ups Work?
Push-ups primarily train the muscles that press your body away from the floor:
- Pectoralis major: The main chest muscle helps move the upper arm across the body and produces much of the pressing force.
- Triceps brachii: The muscles along the back of the upper arm straighten the elbows.
- Anterior deltoids: The front shoulder muscles assist the press and help control the upper arm.
Several muscles also work isometrically, meaning they create tension without producing most of the visible movement:
- The abdominals resist excessive arching and help connect the rib cage to the pelvis.
- The glutes and quadriceps help keep the hips and knees extended.
- The serratus anterior and other upper-back muscles help control the shoulder blades.
- The forearms and hand muscles help maintain a steady base.
Changing the variation shifts the challenge. A close-grip push-up usually asks more of the triceps, while a decline push-up increases the demand on the shoulders and upper chest. These versions still use many of the same muscles.
Benefits of Push-Ups
Build Upper-Body Strength
Push-ups train the chest, shoulders and triceps together in a practical pressing pattern. As your strength improves, you can progress from a wall to an incline, from an incline to the floor, or to more challenging variations.
Challenge Core Stability
Holding a straight body line teaches your trunk to resist unwanted extension and rotation. This is why a well-performed push-up can feel like both an upper-body exercise and a plank.
Require Little or No Equipment
You can perform push-ups at home, in a gym, in a classroom or outdoors. A wall, countertop or sturdy bench is enough to create an easier version. That makes push-ups convenient for warm-ups, circuits and short activity breaks.
Scale Across Fitness Levels
The difficulty can be changed without abandoning the movement. Raise your hands to reduce resistance, lower the incline as you improve, slow the tempo for more control or elevate your feet for a harder challenge.
Develop Muscular Endurance
Moderate- or higher-repetition sets can challenge the ability of your pressing muscles and trunk to maintain effort. Stop the set when your form begins to change rather than chasing a number with rushed repetitions.
Push-Up Modifications for Beginners
You do not need to complete a floor push-up before the exercise can be useful. Select a version that allows a smooth descent, a stable trunk and a strong press.
1. Wall Push-Up
Stand facing a wall and place your hands around chest height. Walk your feet back until your body forms a straight line. Bend your elbows to bring your chest toward the wall, then press away. Move your feet closer to make it easier or farther back to add difficulty.
2. Incline Push-Up
Place your hands on a stable countertop, railing, bench or box. Keep the same head-to-heel body line used in a floor push-up. A higher surface is easier; a lower surface is harder. This is one of the simplest ways to measure progress because you can gradually lower the hand position.
3. Knee-Supported Push-Up
Start on your hands and knees, then move your knees back until you form a straight line from knees through hips to shoulders. Lower your chest between your hands and press up without bending at the hips. Place a mat under your knees if needed.
4. Reduced-Range Push-Up
Perform the floor or incline version through the range you can control. A foam pad or another safe target can give you a consistent stopping point. Increase the depth gradually while maintaining the same body position.
5. Negative Push-Up
Begin at the top of a floor push-up and lower for three to five seconds. Place your knees down to return to the start, or reset completely between reps. Eccentric practice can build control, but it can also create muscle soreness, so begin with a small number of repetitions.
Progression tip: First choose an incline where you can perform every rep with the same depth and body line. When the set feels steady, add a few reps or lower the surface slightly. You do not have to rush to the floor.
Push-Up Variations
- Tempo push-up: Lower for three seconds, pause briefly and press up with control. The slower speed makes each rep more demanding.
- Pause push-up: Hold the bottom position for one or two seconds without resting on the floor, then press.
- Close-grip push-up: Bring the hands closer than your usual position while keeping the elbows controlled. This commonly increases the triceps challenge.
- Decline push-up: Place your feet on a stable raised surface. More body weight shifts toward the hands, increasing the upper-body demand.
- Push-up with shoulder tap: After each rep, tap the opposite shoulder while resisting hip rotation. Widen your feet for more stability.
- Spiderman push-up: Bring one knee toward the same-side elbow as you lower, then switch sides on the next repetition.
- Plyometric push-up: Press forcefully enough for the hands to leave the surface. This advanced option requires excellent landing control and is not necessary for general fitness.
Master the standard pattern or an appropriate modification before adding speed, instability or impact. A variation is useful only when it matches the goal and can be performed safely.
Common Push-Up Mistakes and How to Fix Them
Mistake 1: Elbows Flare Straight Out
What it looks like: The upper arms form a wide T shape with the torso.
Try this: Turn the elbow creases slightly forward and guide the elbows back on a diagonal. Imagine making an arrow shape with your upper arms and body.
Mistake 2: Hands Are Too Far Forward
What it looks like: The hands sit near the face and the shoulders travel awkwardly toward the ears.
Try this: At the bottom, aim to have your palms around chest level. Reset your high plank after moving the hands.
Mistake 3: Hips Sag
What it looks like: The stomach and pelvis drop before the chest.
Try this: Squeeze your glutes, tighten your legs and lightly bring your ribs toward your pelvis. Use a higher incline if you cannot maintain that line.
Mistake 4: Hips Stay Too High
What it looks like: The body forms an upside-down V and the head reaches the bottom before the chest.
Try this: Shift your chest slightly forward, lower the hips into line with the shoulders and heels, and choose an easier version.
Mistake 5: Reaching With the Head
What it looks like: The chin moves toward the floor while the chest stays high.
Try this: Keep the back of your neck long and look slightly ahead of your hands. Think about lowering your chest between your palms.
Mistake 6: Rushing or Bouncing
What it looks like: The body drops quickly, rebounds or loses tension between repetitions.
Try this: Count two seconds down and one second up. Reduce the rep target or raise your hands if the tempo cannot be controlled.
Mistake 7: Unplanned Partial Reps
What it looks like: Each rep becomes shallower as fatigue builds.
Try this: Use a consistent target for your chest or stop the set when the chosen range changes. Partial reps can be programmed, but they should be intentional.
Mistake 8: Holding Your Breath
What it looks like: Your face and neck tense while repetitions become rushed.
Try this: Inhale during the controlled lower and exhale as you press. Pause at the top to reset if needed.
How Many Push-Ups Should You Do?
Your target should reflect your current ability and the purpose of the workout. Keep one or two clean repetitions in reserve when learning the movement.
- Beginner practice: 2 sets of 5 to 8 wall, incline or knee-supported push-ups
- General strength and fitness: 2 to 3 sets of 8 to 15 controlled reps
- Muscular-endurance circuit: 15 to 40 seconds of steady repetitions
- Tempo practice: 2 to 3 sets of 4 to 8 slow repetitions
- BoardGains game: Complete the number on the card using the version that matches your level
Rest about 45 to 90 seconds between general sets, or longer if you need it to restore good form. When you can easily reach the top of your rep range, lower your incline, add a pause or choose a slightly harder variation. You do not need to test your maximum every workout.
Simple Push-Up Workout
- Choose a wall, incline, knee-supported or floor push-up.
- Complete 6 to 12 controlled reps.
- Rest for 45 to 75 seconds.
- Repeat for 2 or 3 total sets.
- Stop or adjust the variation if your body line, depth or elbow path changes.
How to Teach Push-Ups in PE or Group Fitness
Push-ups work well in stations, circuits and team workouts because they require little space. Good coaching helps participants choose a level that is challenging without turning the exercise into a test of pride.
- Demonstrate the exercise from the front and side so participants can see hand position, body line and elbow path.
- Show wall, incline, knee-supported and floor choices before the set begins.
- Use stable walls, benches or boxes that will not slide or tip.
- Give each person enough space for their hands, feet and elbows.
- Coach ability-based options rather than assigning variations by gender.
- Use one cue at a time, such as “body moves together” or “press the floor away.”
- Encourage participants to stop if they feel sharp pain, numbness or joint discomfort.
For a mixed-level class, set a time interval and let each person use an appropriate version. This keeps the group moving together without requiring everyone to complete the same number of floor push-ups.
Push-Ups in BoardGains
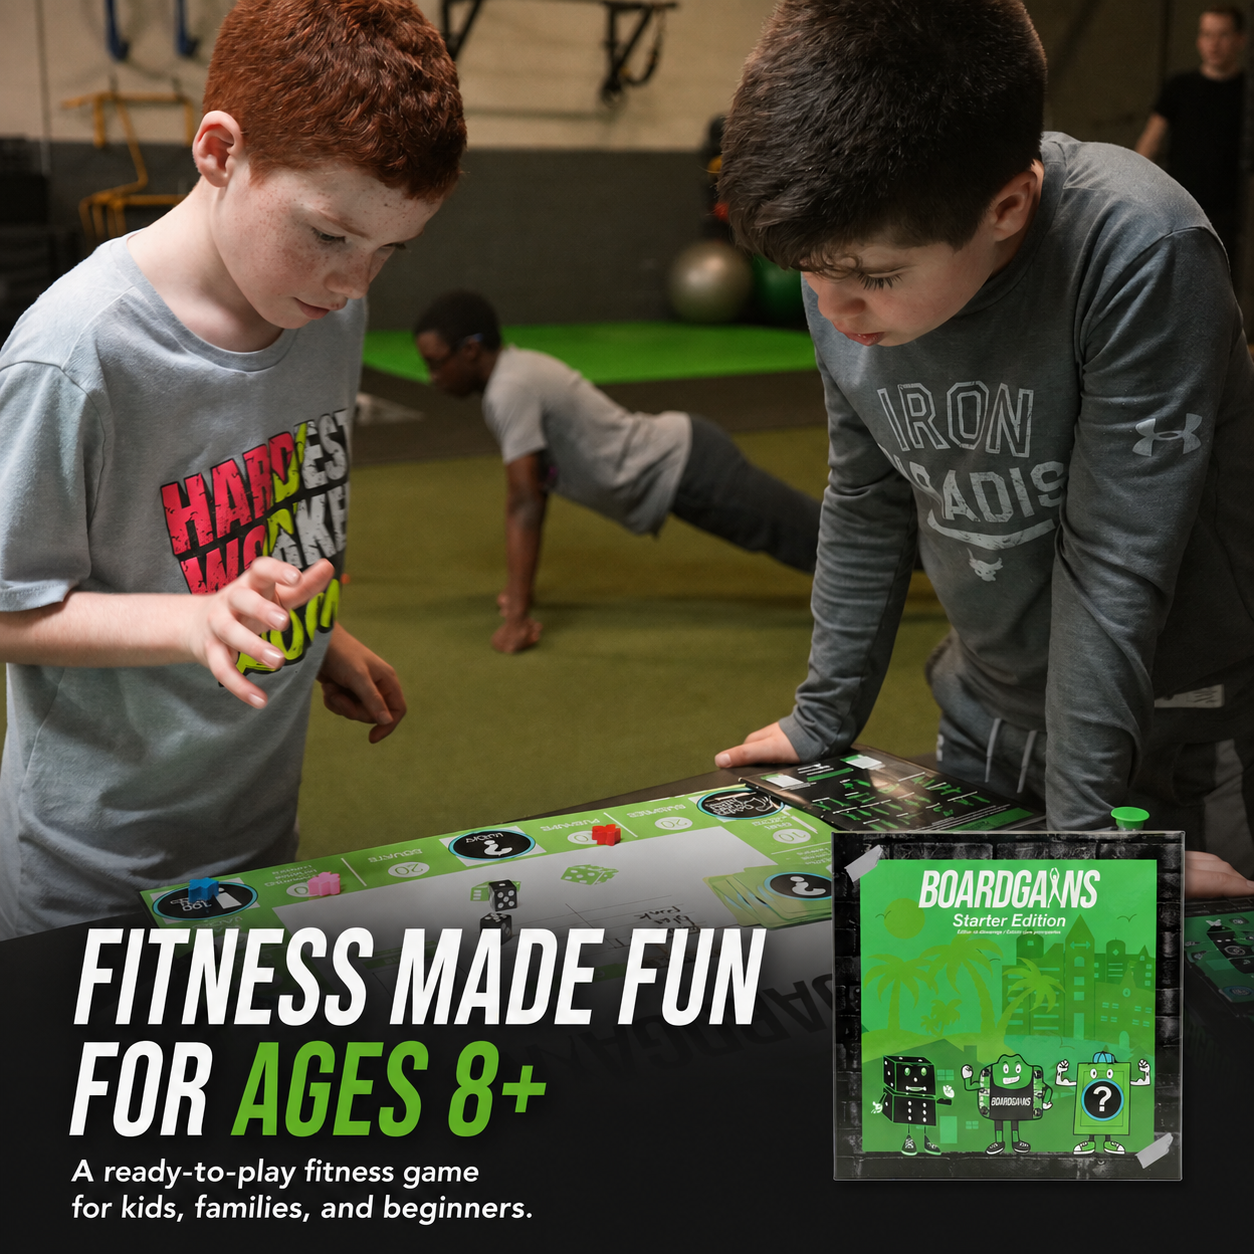
Push-ups are one of the bodyweight exercises used in BoardGains workouts and games. When a push-up card appears, the number on the card tells players how many repetitions to complete. Players can use a floor, knee-supported, incline or wall version so the activity stays accessible.
For a class or team, set up a stable modification area before play begins. A wall can serve beginners, while a sturdy bench or box provides a middle step between wall and floor push-ups. Count one rep only after the player lowers with control and returns to the chosen starting position.
Turn Push-Ups Into a Game
Use BoardGains to bring movement, teamwork and friendly competition into PE classes, group training, family fitness and team events.
Push-Up FAQs
Are incline push-ups or knee push-ups better for beginners?
Both can work. An incline push-up keeps the head-to-heel plank used in a floor push-up and is easy to progress by lowering the surface. A knee-supported push-up also reduces resistance but changes the contact point. Choose the version that feels stable and allows consistent technique.
How wide should my hands be?
Start with your hands slightly wider than shoulder-width and around chest level. From there, adjust a little based on your arm length and comfort. Very wide or very narrow positions change the demand and are better treated as variations.
What angle should my elbows be during a push-up?
About 30 to 45 degrees from the torso is a practical starting point for many people. You do not need to force an exact angle. Aim for a controlled diagonal path instead of flaring the elbows straight out or pinning them tightly to your sides.
Does my chest have to touch the floor?
No. Lower through the deepest range you can control without pain or losing your body line. Some people touch the floor comfortably, while others use a slightly shorter range. Consistency matters more than forcing depth.
Why do my hips sag during push-ups?
Your current variation may be too demanding, or you may be losing tension through your trunk and legs. Squeeze your glutes, brace your stomach and use a higher incline. Practice holding a strong high plank before adding the lowering motion.
What should I do if push-ups hurt my wrists?
Stop if the pain is sharp or persistent. Check that you are spreading pressure across the whole hand rather than collapsing into the heel of the palm. An incline reduces wrist loading for many people. Push-up handles may allow a more neutral wrist, but they must be stable. Seek guidance from a qualified health professional if pain continues.
What should I do if push-ups hurt my shoulders?
Stop the painful set. Try an easier incline, check that your hands are not too far forward and guide your elbows back instead of straight out. Use only a comfortable range. Ongoing, sharp or worsening shoulder pain should be assessed by a qualified health professional.
What if I cannot do one floor push-up?
Start with a wall or high incline and build quality repetitions there. Gradually move to lower surfaces as you become stronger. A modified push-up is still a real push-up and can be progressed systematically.
Do push-ups help with weight loss?
Push-ups can contribute to an active routine and help develop strength, but no single exercise determines fat loss. Body-weight change depends on overall energy balance, nutrition, sleep, daily movement and the rest of your training.
Can I do push-ups every day?
Some people tolerate frequent low-volume practice, but hard sets create fatigue and require recovery. Your experience, total training and joint comfort matter. If performance drops or soreness persists, reduce the volume or include rest days.
Will push-ups make my chest and arms bigger?
Push-ups can support muscle growth when the sets are challenging enough and progress over time. Results also depend on training volume, nutrition, recovery and individual response. As standard push-ups become easy, use harder variations or additional resistance if muscle growth is the goal.
What counts as one push-up?
Start in your chosen plank position, lower with control through your planned range, then press back to the same starting position. That complete lower-and-press cycle counts as one repetition.
Final Push-Up Form Checklist
- Hands around chest level and slightly wider than shoulders
- Full palms down with fingers spread
- Head, hips and heels—or knees—held in one long line
- Abdominals, glutes and legs active
- Chest lowers between the hands
- Elbows travel back on a controlled diagonal
- Shoulders and hips rise together
- Comfortable, repeatable depth
- Inhale down and exhale while pressing
- Use a wall, incline or knee-supported version when needed
Strong push-ups are built through consistent practice, not rushed repetitions. Choose the right level, keep the whole body connected and progress only when your current version looks and feels steady.






2 comments
sheelapandi sekar
Never skip the warm-up! It primes your body for the intense workout ahead.
https://www.siitus.com/2024/08/20/push-workout-the-ultimate-guide-to-building-upper-body-strength/
Tiara Lee
“Arnold’s interview reminded me that there are no shortcuts to success, especially in fitness. His insights on push-ups echo his philosophy of hard work and determination. It’s time to embrace the challenge and work on those push-ups like never before!
http://arnoldschwarzeneggers.com/
Leave a comment
This site is protected by hCaptcha and the hCaptcha Privacy Policy and Terms of Service apply.